In an era where online privacy is of paramount importance, securing your internet connection becomes a crucial step towards protecting your personal data. One effective way to achieve this on your Android device is by enabling Secure Private DNS. This feature encrypts your DNS (Domain Name System) queries, adding an extra layer of security to your internet connection. In this tutorial, we’ll guide you through the process of enabling Secure Private DNS on your Android device.
Step 1: Check Android Version
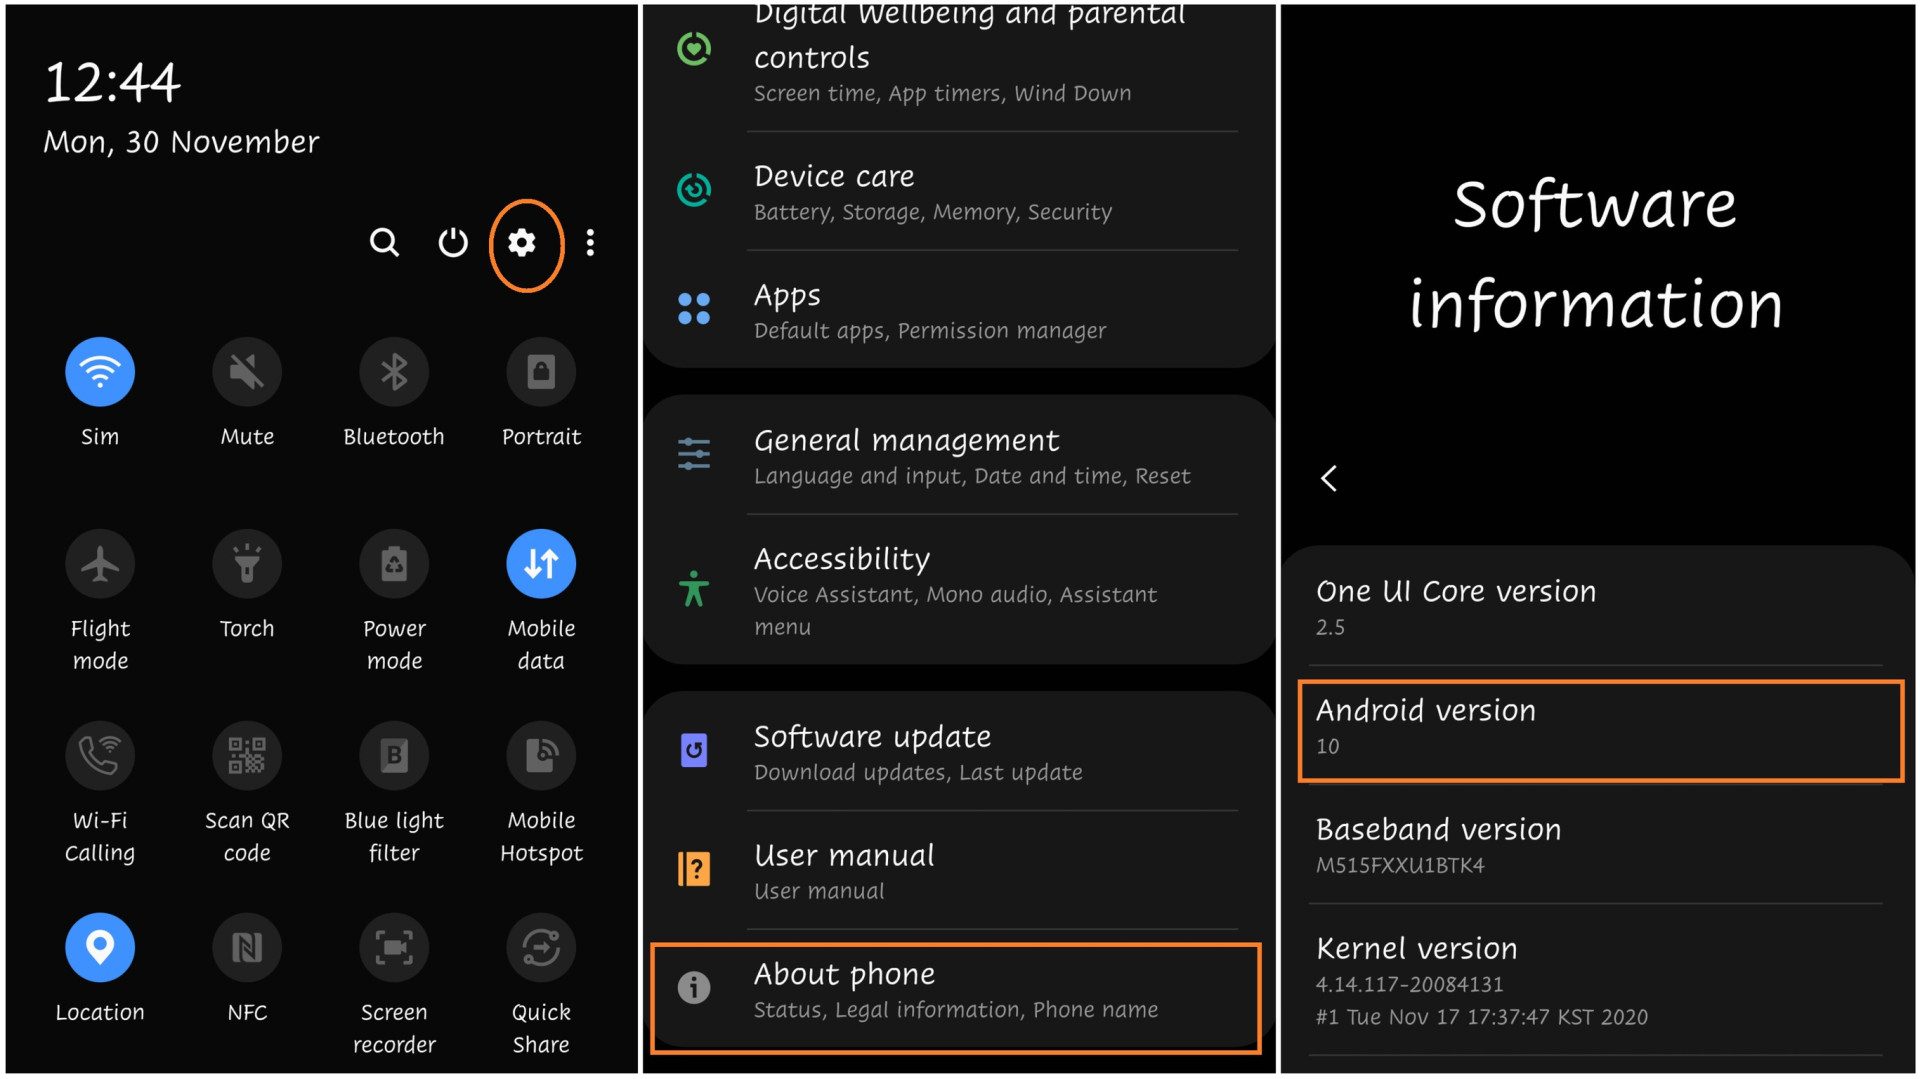
Before you proceed, make sure your Android device is running Android 9 (Pie) or a later version, as Secure Private DNS is a feature introduced in Android Pie.
Step 2: Navigate to Network Settings
- Open the “Settings” app on your Android device.
- Scroll down and tap on “Network & Internet.”
Step 3: Access Private DNS Settings
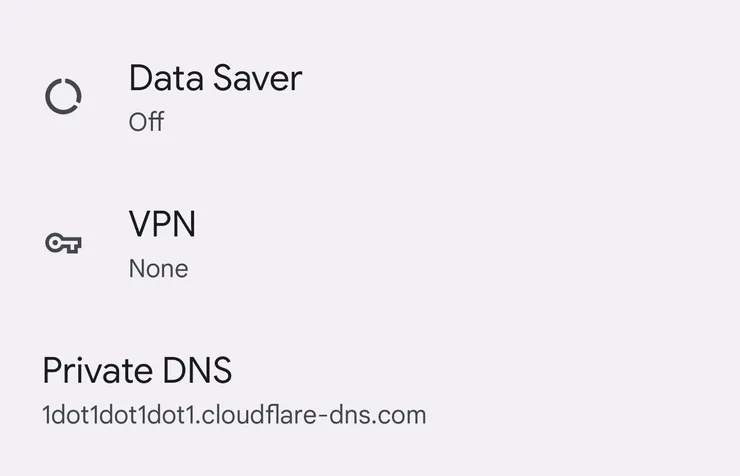
- Within the “Network & Internet” settings, locate and tap on “Private DNS.”
- You may see different options depending on your device and Android version. Look for “Private DNS provider hostname” or a similar option.
Step 4: Choose a Secure Private DNS Provider
- There are several secure DNS providers available. One popular choice is Cloudflare’s 1.1.1.1, which prioritizes privacy and speed.
- Obtain the Private DNS provider hostname for your chosen service. For Cloudflare, the hostname is
1dot1dot1dot1.cloudflare-dns.com.
Step 5: Enter the Private DNS Provider Hostname
- In the “Private DNS provider hostname” field, enter the hostname of your chosen DNS provider.
- Example for Cloudflare:
1dot1dot1dot1.cloudflare-dns.com
- Example for Cloudflare:
- Save the changes.
Step 6: Verify Secure Private DNS Connection
- Once you’ve entered the Private DNS provider hostname, your device will attempt to connect to the secure DNS service.
- To verify the connection, open a web browser and visit https://1.1.1.1/help. This page will confirm if your device is successfully using the Secure Private DNS.
Step 7: Troubleshooting
If you encounter issues, double-check the entered Private DNS provider hostname. Ensure that your internet connection is stable and that the chosen DNS provider is operational.
Step 8: Additional Considerations
- Choose a Reputable DNS Provider: While Cloudflare is a popular choice, other providers like Google’s DNS (
dns.google) and Quad9 (9.9.9.9) are also reliable. - Consider a VPN: For an extra layer of privacy, consider using a Virtual Private Network (VPN) in conjunction with Secure Private DNS.
By following these steps, you’ve successfully enabled Secure Private DNS on your Android device, enhancing your online privacy and security. Regularly updating your device and staying informed about privacy best practices will further contribute to a safer online experience.
Related Posts

List of 8 Best Encrypted Messenger Apps for Android

Samsung’s Android 14 update breaks wireless Android Auto for some